If you don’t want to spend more money on expensive products, but still want a clear glass skin, this article is for you because I’m going to show you 5 Korean home remedies for glowing skin. I’ve selected ones that really worked and don’t worry, you won’t need any crazy equipment for this. Also, a lot of you guys were asking questions about DIY products, so in this article I’ll be explaining in detail about the recipe, usage, storage and other things you’re curious about, so make sure to reading until the end.
Disclaimer, before using this, make sure to wash your face.
1. cucumber mask
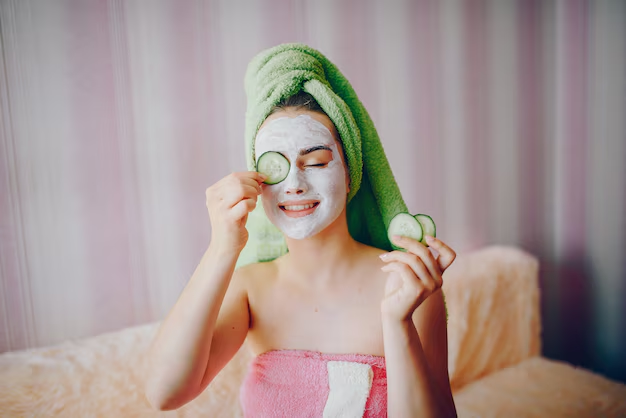
we’re going to make a cucumber mask. I feel like rice is really popular, but cucumber also has been like an OG ingredient for skincare in Korea for decades. When the skin needs soothing, almost every Korean household used to place cucumber slices on their face. You only need a cucumber and aloe gel. Start by washing half a cucumber, then grate it or slice it very thinly. Apply a thin layer of aloe gel so that cucumber slices don’t slide off your face and place cucumber slices carefully on your skin.Lie down and relax for about 10 to 15 minutes. Cucumbers packed with water and vitamins, making it really good for soothing and hydrating. Once you’re finished, simply remove the cucumber and continue with your regular skincare routine.
2. Rice
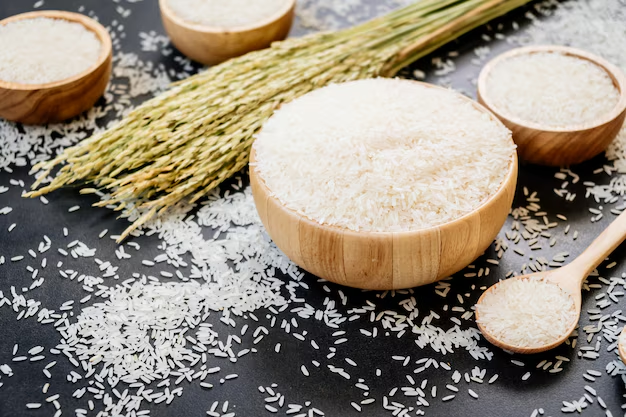
is a mask using our star ingredient rice. This is actually ancient old Korean beauty remedy because there’s historical records saying hot girls from Chosun dynasty used rice to wash their face and even as a lotion.For this recipe you only need honey and rice. Put half a cup of rice in a bowl and some of you guys were asking if you can use different types of rice. And yes, you can use any types of rice and wash the rice for about three times. Also, if you don’t feel like impurities are removed well, you can rinse it a few times more.Now we’re going to cook. Rice. So add 1 cup of water and cook it until you see this mushy consistency. Take it off the heat and let it cool. Now we’re going to put it in a blender. Add 2 tablespoons of water and one tablespoon of honey and blend.Now we’re done making rice masks. This is one of my favorites as rice is known to be really effective for improving skin tone, brightening and keeping skin soft and moisturized. Quick dip here. If you leave them on for too long, it can actually dry out your skin, so it’s better to use it for just 10 to 15 minutes and then rinse it off gently with lukewarm water.And you can continue with your skincare and don’t forget to put moisturizer after that. Also, face masks can be irritating if you use it too often, so using one or two times a week is enough.
3. yogurt almond mask
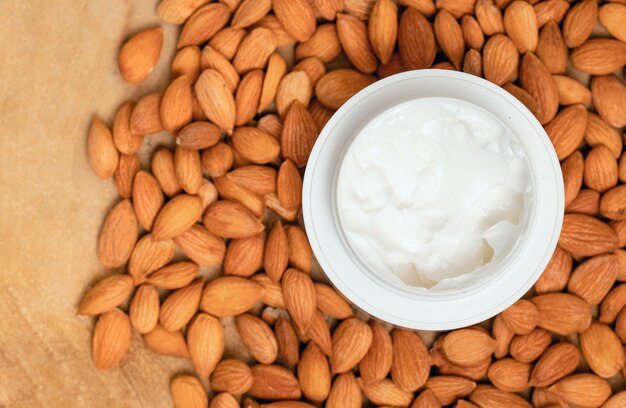
Our final recipe in this chapter is the yogurt almond mask. We’re going to grind almonds first.Take half a cup of yogurt, 2 tablespoons of almond powder, and 1 and a half tablespoons of aloe gel for extra moisture and soothing effect. Yogurt and almond both have antibacterial effects, which can help prevent harmful bacteria growth on the skin, plus they offer a light exfoliating effect.
4. rice

Image credit by freepik
Moving on to our next chapter is DIY toners, and we’re going to use rice again this time. The method is simple,Wash the rice thoroughly, preferably three to four times, and on the last time, gently agitate the rice. Leave it under room temperature for about 30 minutes, and use the strainer to only get water out of it. And there we have it, the rice toner. You can use it to rinse your face, but you can also use it as a toner. Actually, fermented rice is known to have more nutrients and benefits than non fermented ones, but personally I don’t really enjoy the smell of fermented rice, so I don’t use it that way.
But the method is the same. Just leave the rice water at room temperature for over 24 hours and it’ll start to ferment slowly. Moving on to our final DIY is a green tea toner. This is another super old DIY as it’s also known to be really good for acne prone and sensitive skin. It’s super simple. Bring water to the boil, add water on a cup with green tea bag. Let it brew for 5 to 10 minutes and be careful to not do it for long as the acidity might increase.
It is full of powerful antioxidants and also has a soothing effect on your skin. Now let it cool down and when it becomes lukewarm, pour it into a mist bottle. Now you can add a little aloe vera gel to it and this is optional. Here is another quick tip when you use DIY toners, make sure to store them in the fridge. And I try to use it as quickly as possible because it does not contain preservatives. So store it for a maximum of 5 days. Now how do you incorporate it into your skincare routine?